
Drain Line and Supply Line Placement for New Shower Builds in Columbus, OH
- October 9, 2026
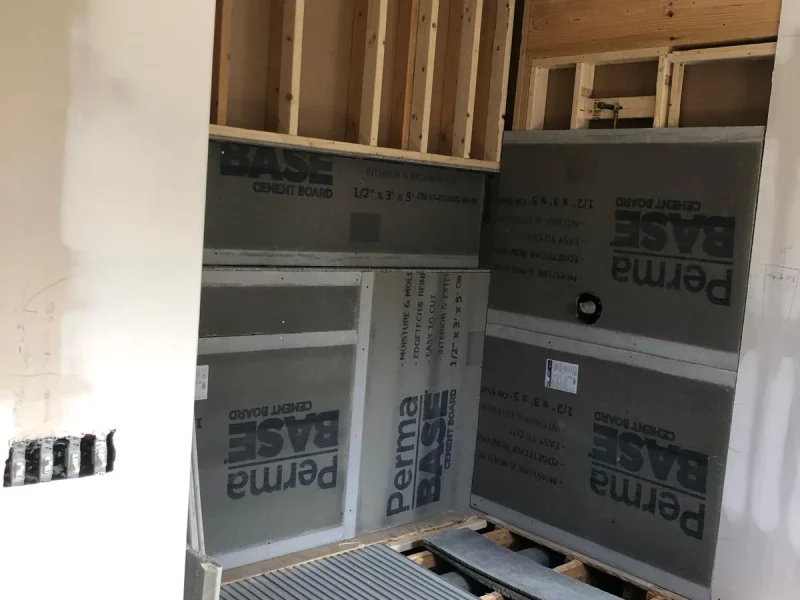
A shower that looks and functions the way it should starts with decisions made long before any tile is installed. Where the drain sits, how far from the wall the valve lands, where the showerhead supply exits the wall — all of these are determined during the plumbing rough-in stage, and all of them affect how the finished shower looks and performs for the life of the bathroom.
At Beltran Tiles LLC, we build custom showers throughout Columbus, OH from the ground up, coordinating plumbing rough-in with the tile layout that follows. When drain lines, supply lines, and valve positions are planned in relation to the tile rather than independent of it, the finished result is a shower where every element lines up the way it was intended.
Why Drain and Supply Line Placement Matters Before Tile Goes In
Once the concrete cures and the walls are closed, the plumbing is fixed. There is no adjusting a drain that is an inch off-center or a supply stub-out that exits the wall in the middle of a tile rather than at a grout joint. Every decision made during rough-in becomes permanent the moment the substrate goes up over it.
That permanence is why placement has to be planned — not just set to a standard dimension and left for the tile installer to work around. A drain that is centered in the shower floor relative to the planned tile layout produces a cleaner result than one that is centered in the room without regard for how the tile will fall around it. A showerhead supply that exits the wall at a grout joint is easier to trim out neatly than one that cuts through the face of a large-format tile.
Getting these details right requires the plumber and tile installer to communicate before any pipe is set — which is an advantage when a single contractor handles both scopes.
Drain Line Placement for New Shower Builds
Center drain positioning
In a standard square or rectangular shower with a center drain, the drain is positioned at the geometric center of the shower floor. For a tile layout, that center point needs to align with either the center of a tile or the intersection of four tiles, depending on the tile size and the planned layout.
For small-format tile — mosaic, penny tile, or 2×2 — centering the drain in the room is generally acceptable because the tile is small enough to cut around the drain in any position. For large-format tile in the 12-inch range or larger, the drain position should be planned relative to the tile module so that the cuts around the drain perimeter are symmetrical and not slivers.
Drain elevation
The drain body is set at a specific height during rough-in based on the total thickness of the shower floor assembly that will be built over it: waterproofing membrane, mortar bed or pre-sloped foam pan, and tile. The goal is for the top surface of the drain grate to sit flush with the finished tile surface. A drain set too high will sit above the tile and create a trip hazard; a drain set too low will require shims that are never fully invisible.
For a traditional mud-set shower floor, total buildup from the subfloor to the finished tile surface is typically 2 to 3 inches, depending on the slope and mortar bed thickness. For a pre-sloped foam shower pan system, buildup is more predictable and the manufacturer specifies the target drain height directly.
Drain slope
The drain line running from the shower drain to the main drain stack must slope continuously downward — a minimum of 1/4 inch per foot for 2-inch and 3-inch drain lines under the Ohio Plumbing Code. Insufficient slope allows water and waste to sit in the line rather than drain completely, which leads to odor, slow drainage, and eventual blockage. The slope is set when the drain line is run and cannot be corrected after the concrete slab or subfloor is in place.
Drain line size
Shower drain lines in new construction are typically 2 inches in diameter, which is the minimum allowed under the Ohio Plumbing Code for a single shower. In showers with multiple body sprays or high-flow fixtures that discharge significant water volume simultaneously, a 3-inch drain line may be appropriate to handle the combined flow rate without backing up.
Supply Line Placement for New Shower Builds
Shower valve position
The shower valve controls the water temperature and flow for the entire shower. Its position in the wall affects both function and aesthetics. Standard rough-in height for a shower valve is 48 inches from the finished floor to the center of the valve body — a comfortable operating height for most adults. This can be adjusted up or down based on the shower design or homeowner preference, but deviating significantly from standard height should be intentional.
The horizontal position of the valve is typically centered on the shower wall where it is installed, or placed at a specific offset if the shower layout includes a built-in bench, niche, or other feature that affects where a person stands to operate the valve.
Valve depth
The valve body is embedded in the wall framing at a specific depth so that the trim plate seats flush against the finished tile surface. The correct depth depends on the thickness of the wall assembly: framing, cement board or backer, waterproofing membrane, mortar if applicable, and tile. Each valve manufacturer specifies the required depth for their trim system, and that specification has to be referenced before the valve is set in framing.
A valve set too deep requires an extension sleeve to bring the trim out to the tile surface — adding cost and a visible joint. A valve set too shallow means the trim plate cannot sit flush and the escutcheon will not seal correctly against the tile.
Showerhead supply stub-out
The showerhead supply exits the wall at the height specified for the showerhead being installed. Standard showerhead height is 80 inches from the finished floor, though ceiling-mount rainheads, adjustable slide bars, and custom configurations all have different supply positions. For a fixed showerhead, the supply stub-out exits the wall centered on the showerhead location and is capped during rough-in until the trim-out stage.
For a rainhead arm that comes through the ceiling rather than the wall, the supply is run through the ceiling framing and exits from above. This requires coordination with the ceiling framing and any recessed lighting or exhaust fan that occupies the same ceiling space.
Body spray and handheld supply positions
Showers with multiple body sprays or a handheld wand on a slide bar have additional supply stub-outs at heights specific to each fixture. Body sprays are typically positioned at chest height (42 to 48 inches) or in a vertical array across the wall. Slide bar supplies exit the wall at the bottom of the bar’s travel range, typically 24 to 30 inches from the finished floor.
Each additional supply stub-out is a point where the tile has to be cut cleanly around the fixture trim — which means position relative to the tile layout matters for each one, not just the primary valve.
Coordinating Rough-In With Tile Layout: What to Establish Before Pipe Is Set
Before the plumber sets any drain or supply lines in a new shower build, the following should be confirmed:
- Shower floor tile size and layout — determines where the drain center should land relative to the tile module
- Shower floor assembly thickness — determines drain elevation
- Wall tile size and layout — determines where supply stub-outs should exit relative to grout joints
- Valve specification — determines required valve depth based on wall assembly thickness and trim system
- Fixture list — showerhead type, body sprays, handheld, and any ceiling-mount fixtures all have different supply positions
- Niche locations — built-in niches occupy wall framing space and need to be coordinated with supply line routing behind the wall
When these decisions are made before rough-in begins, the plumber can set everything to work with the tile layout. When they are made after, the tile installer inherits fixed conditions that may or may not align with what the tile needs.
Drain Line and Supply Line Placement for New Showers in Columbus, OH
At Beltran Tiles LLC, we handle both the plumbing rough-in and the tile installation for new shower builds throughout Columbus, OH and the surrounding areas. Because we manage both scopes, drain elevation, valve depth, and supply stub-out positions are set with the tile layout in mind from the start — producing a finished shower where fixtures trim out cleanly and tile cuts land where they should.
Building a new shower in Columbus, OH? Contact Beltran Tiles LLC today for a free consultation and estimate.
Share it :
Transform your home with expert craftsmanship
Upgrade your space with high-quality residential remodeling services in Columbus, OH. From tile installation to complete home improvements, Beltran Tiles LLC delivers precision, durability, and results you can trust.

Beltran Tiles LLC provides reliable residential remodeling services in Columbus, OH and surrounding areas. With over 23 years of experience, we deliver quality craftsmanship you can trust.
Contact
- Columbus, OH
- 40 Miles Of Coverage
- davidbeltran614@gmail.com
- info@beltrantiles.com
- (614) 517-6763
Info
- Monday to Saturday 8:00 AM - 6:00 PM
- By appointment only
- 24/7 Emergency Service
- +23 Years of Experience
- Residential Services Only
- Licensed & Insured
- Cash, Check & Zelle
- English and Spanish spoken