
How to Install Large Format Tile in a Custom Shower in Columbus, OH
- September 25, 2026
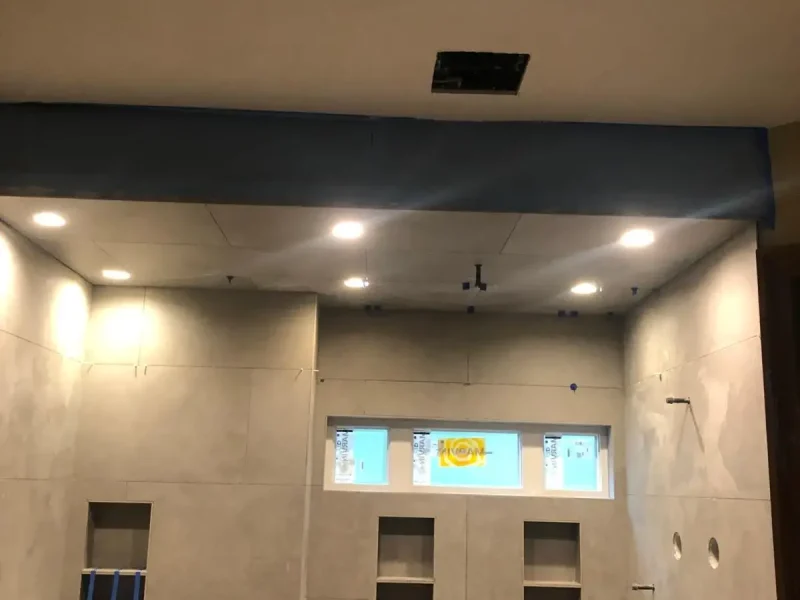
Large format tile has become one of the most requested finishes in custom shower builds across Columbus, OH — and for good reason. Tiles in the 24×24, 24×48, or larger range cover more surface area per piece, produce fewer grout lines, and create a cleaner, more seamless look on shower walls than smaller tile formats. When the material is a concrete-look porcelain or a large stone-style ceramic, the result is a shower that reads as modern, intentional, and built to a higher standard than standard tile work.
At Beltran Tiles LLC, we install large format tile in custom showers throughout Columbus, OH and the surrounding areas. The format is striking when done correctly — and noticeably problematic when it is not. Large tiles demand a level of substrate preparation, layout precision, and installation technique that smaller tile formats simply do not require to the same degree.
What Makes Large Format Tile Different to Install
The appeal of large format tile is straightforward: fewer joints, more visual continuity, a surface that reads as architectural rather than decorative. What is less obvious until you are mid-installation is that the format amplifies every variable in the process.
Substrate flatness requirements are tighter. A small tile can flex slightly and still seat properly. A 24×48 tile bridges any unevenness in the wall surface and will rock, crack, or produce lippage if the substrate beneath it is not flat to within tight tolerances. The TCNA standard for large format tile calls for no more than 1/8 inch variation over 10 feet — a threshold that requires active correction on most walls before tile can go up.
Full mortar coverage is non-negotiable. Smaller tiles can set with partial back coverage and still hold adequately. Large format tile requires 95% mortar coverage on the back of every piece — achieved through a combination of trowel application on the wall and back-buttering each tile individually. A void behind a large tile creates a hollow spot that can crack the tile under foot traffic or thermal movement, and can allow moisture to migrate behind the installation in a wet shower environment.
Lippage is more visible. The edge of a large tile that sits even slightly higher or lower than the adjacent tile reads as a flaw across the entire wall surface. Preventing lippage requires a flat substrate, consistent mortar bed, and careful leveling with each tile placement.
Layout lines require more planning. Large tiles need to be centered precisely on the wall so that cut tiles at the edges are symmetrical and not slivers. A 24-inch tile that starts one inch off-center can produce a 1-inch sliver cut on the opposite wall — a problem that is visible from across the room and difficult to correct after installation is underway.
Step-by-Step: Large Format Tile Installation in a Custom Shower
- Step 1: Substrate Preparation
The wall surface must be flat, structurally sound, and waterproofed before any tile is installed. In a custom shower, this means a cement board or equivalent backer installed over framing, followed by a waterproof membrane applied to all surfaces — walls, floor, corners, and around any penetrations. The membrane must cure completely before mortar or tile is applied.
Flatness is verified with a long straightedge across the full wall surface. Any high spots are ground down; any low areas are filled and allowed to cure. This step cannot be rushed or skipped — a wall that is not flat before tile is installed will not become flat once tile is on it.
- Step 2: Layout Planning
The center point of each wall is established first. From that center, tile positions are mapped out dry — without adhesive — to confirm that cut tiles at each edge will be symmetrical and adequately sized. For large format tile, a cut tile narrower than half the tile width is generally avoided; if the layout produces narrow cuts, the center point is adjusted before installation begins.
In a shower with built-in niches, window openings, or other features, the layout is planned so that full tiles align with the top and bottom edges of each feature wherever possible. This requires coordinating the horizontal and vertical layout simultaneously before the first tile goes up.
- Step 3: Mortar Selection and Mixing
Large format tile requires a large-format-rated mortar — a medium-bed or large-and-heavy-tile mortar with a non-sag formula for vertical surfaces. Standard thin-set is not appropriate for tile in this size range. The mortar is mixed to the consistency specified by the manufacturer and allowed to slake before use.
- Step 4: Trowel Application and Back-Buttering
Mortar is applied to the wall surface using a notched trowel sized for the tile format — typically a 1/2-inch square-notch or larger for tiles 24 inches and above. The notch ridges are combed in one direction to allow air to escape as the tile is pressed into place.
Each tile is also back-buttered: a skim coat of mortar is applied to the back of the tile before setting. The combination of trowel ridges on the wall and a back-buttered tile produces the full coverage required for large format tile in a wet environment.
- Step 5: Setting and Leveling
Tiles are pressed firmly into place, twisted slightly to collapse the mortar ridges, and seated with a rubber mallet and beating block distributed across the full tile surface. A level is checked in both directions with each placement. Lippage between adjacent tiles is verified with a straightedge before moving to the next tile.
Spacers maintain consistent joint width. For large format tile in a custom shower, a 1/16-inch to 1/8-inch joint is typical — narrow enough to read as nearly seamless while allowing for the grout that protects the joint from moisture.
- Step 6: Cutting at Niches, Windows, and Wall Edges
Built-in niches and horizontal window openings require tile cuts that align precisely with the opening edges. Each cut piece is measured and cut individually on a wet saw with a blade appropriate for the tile material. Cut edges inside niche openings are verified to be square and clean before installation.
Niches are tiled last, after the surrounding wall tile is set, so that niche tile can be fit to the actual opening dimension rather than a planned dimension that may have shifted slightly during installation.
- Step 7: Grouting
Once the mortar has cured fully — typically 24 hours minimum — grout joints are cleared of any mortar squeeze-out and the installation is grouted. For large format porcelain or ceramic tile in a shower, a sanded or unsanded grout is selected based on joint width, with a color chosen to complement the tile. A grout that matches or closely approximates the tile color produces the most seamless visual result with a large format installation.
Grout is applied with a rubber float, worked diagonally across the joints to pack them fully, and excess is removed in stages before it hardens on the tile face.
- Step 8: Sealing and Final Inspection
Grout joints in a shower are sealed once the grout has cured completely — typically 72 hours or more. The sealant penetrates the grout and resists moisture absorption and staining from soap, shampoo, and hard water deposits. The tile surface itself is cleaned and inspected for any lippage, hollow spots, or grout inconsistencies before the shower is put into use.
Design Details That Make Large Format Showers Stand Apart
The installation process produces the structural result — what makes a large format custom shower visually exceptional comes down to a few design decisions made before the first tile goes up:
Recessed niches built to tile dimensions. Niches framed to align with the tile layout look intentional. Niches that cut through a tile at an awkward point look like an afterthought. Planning niche dimensions around the tile module — or adjusting the tile layout to align with planned niche dimensions — produces a finished result where the niche reads as part of the design rather than an interruption of it.
Consistent tile orientation across all walls. Large format tile with a directional texture, veining, or wood-grain pattern reads best when all tiles on all walls are oriented the same direction. A concrete-look porcelain with a subtle texture that runs vertically on one wall and horizontally on the adjacent wall draws the eye to the inconsistency rather than the material.
Rainhead and valve placement planned around tile joints. Penetrations for shower valves, body sprays, and rainhead arms that land in the center of a tile are cleaner than penetrations that land on or near a grout joint. When the rough plumbing is set before tile layout is finalized, small adjustments to the layout can often align penetrations with tile centers.
Large Format Custom Shower Tile Installation in Columbus, OH
At Beltran Tiles LLC, we handle every stage of large format custom shower installation — waterproofing, substrate preparation, layout planning, setting, grouting, and sealing — for homeowners throughout Columbus, OH and the surrounding areas. We work with porcelain, ceramic, marble, and stone tile in all large format sizes, and we coordinate tile layout with built-in niche placement, window openings, and plumbing rough-in locations to produce a finished shower where every element lines up.
Ready to build a custom shower with large format tile in Columbus, OH?
Contact Beltran Tiles LLC today for a free consultation and estimate.
Share it :
Transform your home with expert craftsmanship
Upgrade your space with high-quality residential remodeling services in Columbus, OH. From tile installation to complete home improvements, Beltran Tiles LLC delivers precision, durability, and results you can trust.

Beltran Tiles LLC provides reliable residential remodeling services in Columbus, OH and surrounding areas. With over 23 years of experience, we deliver quality craftsmanship you can trust.
Contact
- Columbus, OH
- 40 Miles Of Coverage
- davidbeltran614@gmail.com
- info@beltrantiles.com
- (614) 517-6763
Info
- Monday to Saturday 8:00 AM - 6:00 PM
- By appointment only
- 24/7 Emergency Service
- +23 Years of Experience
- Residential Services Only
- Licensed & Insured
- Cash, Check & Zelle
- English and Spanish spoken